
Instruction of Plaster Walls
Organizing Walls for Plaster
Installing rock lath, the bottom to which wall plaster is put on is not just a tricky endeavor and necessitates just a couple of tools. If you may swing a hammer or trim wire with tin snips or read a Bachelor’s degree, then you certainly can get your lathing. For convenience and speed, put money into a lathing hatchet.
In the event you would like to use your hammer, you will need to score and slice on the lath with a knife, then that takes more.
First, calculate the square yardage on all surfaces to be covered and arrange lath accordingly.
Obtain metal corner scraped by the linear foot for corners and openings. Ten pounds of all lathing nails will be required for every one hundred square yards of stone lath. The next step is to set up baseboard reasons – 3/4″ timber strips which allow getting some foundation settling and avert plaster fractures. Nail these together all partitions to be plastered. Then go as outlined in these photographs. Don’t forget to maintain all lathing perform fantastically and also the corners square. The concluding occupation will probably be equally as well – or poor – because of this essential bottom occupation.
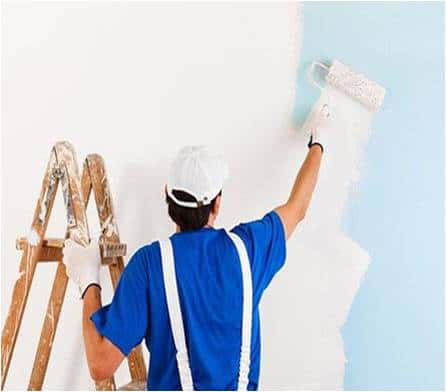
The way to Plaster a Wall
There is an art to making a very good plaster wall, and also using this appropriate gear is vital.
These include a plasterer’s trowel, a corner-shaping tool, a hawk, a darby, a screeding rod plus a thick brush plus a bucket. To dictate the materials you’re going to require, find out the square feet of the region to be covered. The undercoat can be a mixture of sand, prepared gypsum water, and plaster. You will need – for every 10 square feet of under-coat – ninety lbs of plasterer’s sand, cleaned and screeded, and 30 pounds of gypsum plaster.
TOOLS
1. This has a lengthy prop pub across the top side in contrast with all the briefer bar onto the mason’s steel float. It costs a few bucks more and is well worth the price.
2. Hawk: This really could be the traditional mortarboard device.
Utilize one manufactured from aluminum and then help save damage on yourself. The wood kind weighs a great deal more. Load plaster and also maintain the left hand whereas the right does precisely the work.
3. Darby: a two-handled smoothing instrument to level large apartment areas. It is held flat against the walls since it is transferred together and levels out increased stains.
4. Screeding Rod: a straight-edged wood or metallic rod to degree off demanding plaster applications. One finish is normally held towards guides because the top end scrapes extra plaster straight back onto the plank for reapplication.
5. Water Brush: this, and a bucket of clear water, must be kept on hands for finish Essex plastering coating. The brush spreads as well as dashes water across the face currently being troweled smooth.
To mix, use the wheelbarrow or shallow timber box and mix both the sand and plaster, dry, or in 1 end. Tilt the mixing box with all a tender mix while in the upper finish and put water at the very low conclusion. Then draw on the mixed sand and plaster into the water a little at the same moment, mixing regularly.
When warm water is inserted into the dry combination or all of it is pulled into the water at the same time, lumps are formed which can’t be easily broken up. Mix into a heavy cream-like consistency. Insert a lot more of this sterile mix of warm water, just as vital.
Put on the base coat as exhibited from the photographs. The final coating of completing plaster is combined with warm water with no sand and implemented as exemplified. The troweling procedure is quickly mastered. Plaster is put in the complete trowel on upward strokes, with all light pressure only.
Even the trowel in finishing is held at an angle of roughly 30° into the walls. If pressed fiat against the wall, then the trowel is stored by suction and also will pull the plaster off. In case the angle is too good, the edge of the trowel may render wavy lines from the very surface.Essex builders
Re-pair of Plaster Walls
Sooner or later, virtually every plaster ceiling and wall develop cracks – if not from the broader expanses, afterward at where horizontal surfaces join another. Wind pressure on your property, structural growth, and shrinkage targeted visitors’ vibration, and household tasks all lead to diminished plaster. Previous to any redecoration that can happen, the inevitable patching always has to be accomplished.
First, wash all material that looks loose around the crack. If it’s a fair-sized crack, utilize a putty knife as well as also a beer can opener and then start the crack into the deepest area, then undercut it that it’s wider under than to outer surface. Very little cracks may just be brushed thoroughly clean. Using a spray, a rag that is wet, totally soften all the surfaces of this fracture.
If this will be overlooked, then moisture out of the new plaster is going to be consumed into the walls, leaving that the patch powdery and also weak. Mix patching plaster to your thick paste and package it into the crack using a putty knife, instead of a flexible one. Press the mixture into the bottom of the crack, then build up slightly greater than necessary off the excess, and allow it to dry for two to 4 hours.
Then utilize medium-grit glue onto a set cube to smooth off the extra. If you’re going to paint later, a few strokes with fine-grit sandpaper will finish it off nicely. Previous to your paper or paint within this Patch Work, brush one coating or more of thinned shellac for being a size jacket. When there’s not any “glazed” look towards the magnitude jacket if dry, apply a second coat.