Razer Synapse is a capable piece of software, but it’s not something everyone wants running in the background. It consumes system resources, requires a Razer account, and some users simply prefer a lighter setup. The good news is that checking your Razer wireless mouse battery without Synapse is genuinely possible — through the mouse’s own LED indicator, your operating system’s built-in Bluetooth settings, or a couple of lightweight third-party tools.
This guide covers every method that actually works, in order from simplest to most feature-rich. One important note before you start: this guide applies to wireless Razer mice only. If you have a wired Razer mouse, it draws power directly from your USB port and has no battery to check.
Method 1 — Check the LED indicator on the mouse itself
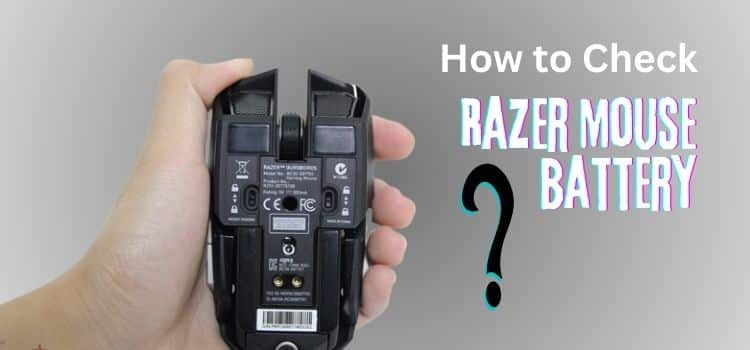
Most wireless Razer mice have a built-in LED battery indicator, and this is the fastest check you can do without any software at all. The LED is typically located near the scroll wheel, on the bottom of the mouse near the sensor, or integrated into the Razer logo.
The color system most Razer mice use:
- Green light — Battery is high, typically above 70–80%. You’re good to go.
- Orange or yellow light — Battery is at a medium level, roughly 30–70%. Worth charging before a long session.
- Red light — Battery is critically low, usually below 20%. Charge now.
- Blinking red — On some models, a blinking red LED means the battery is nearly depleted and the mouse may shut off soon.
How to trigger the LED check on mice that don’t show it passively: Some Razer mice only display the LED battery status when you specifically ask for it. Press and hold the left and right mouse buttons simultaneously for approximately 3 seconds. The LED should light up briefly to show the current battery level. Release the buttons and read the color.
A few practical notes: the exact LED location and behavior can vary by model, so it’s worth a quick check of your mouse’s user manual if you’re not sure where to look. If the LED shows nothing at all when you press the buttons, the mouse may need charging or may be fully powered off.
Method 2 — Check via Windows Bluetooth settings
If your Razer mouse connects via Bluetooth (rather than the 2.4GHz USB dongle), Windows 11 and Windows 10 can display the battery percentage directly — no extra software needed.
On Windows 11:
- Open Settings (Windows key + I).
- Go to Bluetooth & devices.
- Find your Razer mouse in the list of connected devices.
- The battery percentage is displayed directly under the device name.
On Windows 10:
- Open Settings (Windows key + I).
- Go to Devices → Bluetooth & other devices.
- Find your Razer mouse in the list.
- Click on it — the battery level may appear in the details panel.
Important caveat: this method works only for mice connected via Bluetooth. Mice that use Razer’s 2.4GHz wireless USB dongle (HyperSpeed or the standard dongle) generally do not report battery level through Windows Bluetooth settings, because the dongle handles the connection rather than Windows’ native Bluetooth stack. If your mouse is dongle-connected and you’re looking for a percentage, jump to Methods 4 or 5.
Method 3 — Check via macOS Bluetooth settings
On a Mac, checking Bluetooth peripheral battery is even more straightforward.
Method A — Bluetooth menu bar icon:
- Click the Bluetooth icon in the menu bar at the top of your screen.
- Hover over your Razer mouse in the dropdown list.
- The battery percentage appears directly next to the device name.
Method B — System Settings:
- Click the Apple menu → System Settings (macOS Ventura and later) or System Preferences (older macOS).
- Click Bluetooth.
- Find your Razer mouse in the list — the battery level is shown next to it.
Same caveat as Windows: this works for Bluetooth-connected mice. Dongle-connected mice aren’t reported through macOS’s native Bluetooth interface.
Method 4 — RazerBatteryTaskbar (the best free dedicated tool)
For dongle-connected Razer mice, or for anyone who wants a persistent battery percentage always visible in the system tray, RazerBatteryTaskbar is the most purpose-built, widely recommended solution — and it’s free, open-source, and doesn’t require Synapse to be running.
It was specifically created to solve this exact problem and is the top recommendation on Razer Insider (Razer’s official community forum). It works by communicating directly with the mouse via USB rather than pulling data from Synapse, which means it functions completely independently of Synapse.
Supported models include the Basilisk, Naga v2 Pro, DeathAdder V2 Pro, DeathAdder V3 Pro, Viper Ultimate, BlackShark V2 Pro, and others. The project’s GitHub page lists all currently supported devices.
How to use it:
- Search for RazerBatteryTaskbar on GitHub (search “Tekk-Know RazerBatteryTaskbar”).
- Download the latest release from the Releases page.
- Run the application — it places a battery percentage icon in your Windows system tray.
- The percentage updates in real time as the mouse is used.
No installation required — it runs as a portable executable. Always download from the official GitHub repository rather than third-party mirror sites.
Method 5 — Third-party system monitoring tools
Several legitimate, well-established system monitoring tools can display battery information for USB-connected wireless peripherals, including Razer mice. These are broader system tools (not Razer-specific), so results vary by mouse model and connection type.
BatteryBar — A lightweight Windows tool that adds a detailed battery indicator to the taskbar. Works well for Bluetooth-connected devices and some dongle-connected ones.
HWMonitor — A more comprehensive system monitoring tool by CPUID that shows voltages, temperatures, and power information across connected hardware, including some USB peripherals.
OpenHardwareMonitor — An open-source alternative to HWMonitor with similar capabilities.
If you use one of these, always download from the developer’s official site or a verified source like MajorGeeks or Ninite, rather than searching “free download” and picking the first result — the peripheral monitoring software category has some legitimate malware distribution mixed in with the genuine tools.
Which method should you use?
| Your situation | Best method |
|---|---|
| Quick check, no software | Method 1 — LED indicator |
| Bluetooth mouse, Windows | Method 2 — Windows Bluetooth settings |
| Bluetooth mouse, Mac | Method 3 — macOS Bluetooth settings |
| Dongle-connected mouse, want a percentage | Method 4 — RazerBatteryTaskbar |
| Already using system monitoring tools | Method 5 — HWMonitor or similar |
Tips for getting more battery life from your Razer mouse
Once you know the battery level, a few habits help stretch it further:
Turn the mouse off when not in use. Most wireless Razer mice have a physical power switch on the bottom. Flipping it off when you step away prevents background polling and power drain.
Lower the LED brightness or turn off lighting. RGB lighting is one of the biggest battery consumers on wireless mice. In Synapse (if you do use it occasionally), reducing LED brightness or setting a power-saving mode can meaningfully extend runtime.
Keep the sensor area clean. A dirty sensor works harder to track surface movement, which can increase power consumption over time.
Charge before it hits red. Frequently letting a lithium-ion battery fully discharge before charging is harder on the cell over time than topping it up regularly. Charging at orange/yellow rather than waiting for red is better for long-term battery health.
Use the 2.4GHz dongle rather than Bluetooth when battery life matters. Razer’s HyperSpeed 2.4GHz wireless is generally more power-efficient than Bluetooth for active gaming use — a counterintuitive point, but one Razer and independent reviewers have both confirmed.
Conclusion
Synapse isn’t a requirement for keeping tabs on your Razer mouse battery. For a quick check, the LED indicator is all you need — look for green (good), orange (medium), or red (charge soon). For a persistent battery percentage, RazerBatteryTaskbar is the best free, purpose-built option for Windows users with dongle-connected mice, while Bluetooth users on Windows or macOS can get the percentage directly from the operating system’s device settings.
For more tech tips and hardware guides, browse our Technology section. If you’re building a cleaner, lighter gaming setup, our Reviews section covers gaming mice, peripherals, and other hardware in more detail.
Battery LED behavior, color coding, and third-party tool compatibility vary by Razer mouse model and firmware version. Always consult your specific mouse’s user manual or Razer’s official support site for model-specific details. Download third-party tools only from official or verified sources.