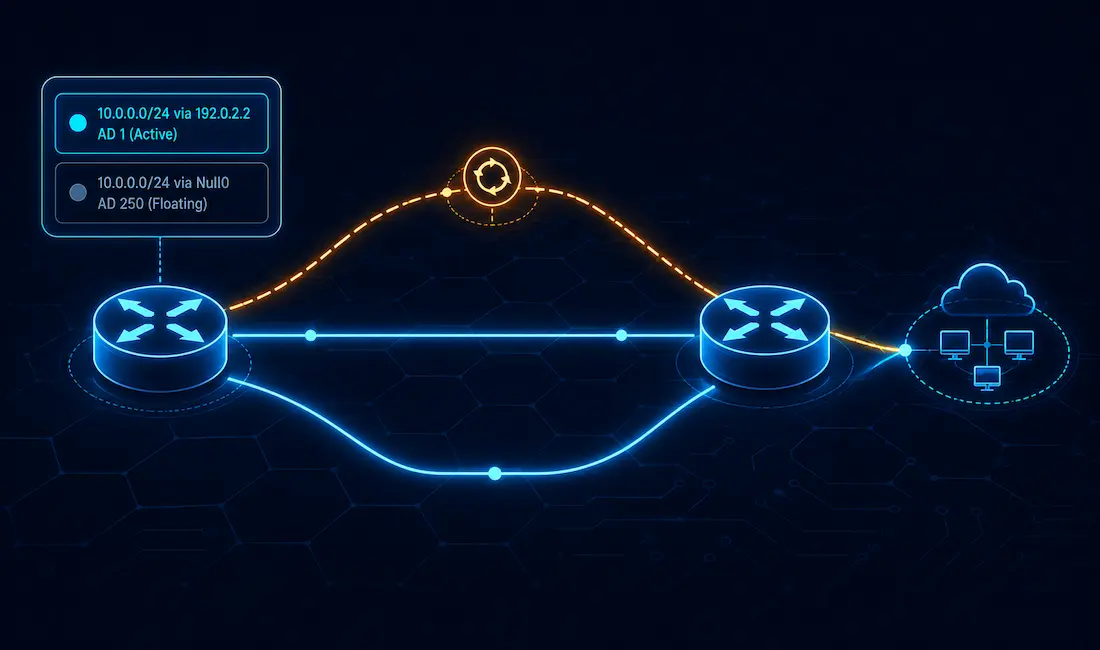
If you already know how to configure a static route for IPv4, configuring IPv6 static routes will feel familiar — the syntax and underlying logic are nearly identical, with only minor differences. IPv6 static routes are configured using the ipv6 route command in global configuration mode. The general syntax is:
Router(config)# ipv6 route ipv6-prefix/prefix-length {ipv6-address | exit-interface}The parameters here map almost directly onto their IPv4 equivalents, and the command supports the same broad categories of static routes:
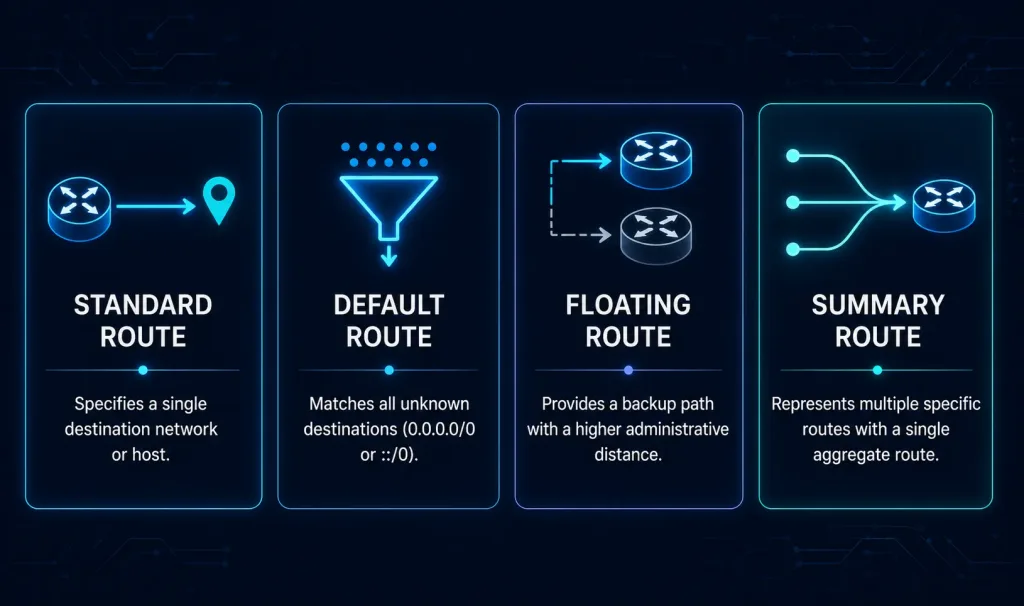
- Standard IPv6 static route — a route to a specific destination network, same concept as a standard IPv4 static route.
- Default IPv6 static route — a catch-all route (
::/0) used when no more specific route matches, equivalent to IPv4’s0.0.0.0/0default route. - Floating IPv6 static route — a backup route configured with a higher administrative distance than the primary route, so it only becomes active if the primary route fails.
- Summary IPv6 static route — a single route representing several smaller subnets, reducing the number of entries in the routing table.
Enabling IPv6 Unicast Routing
Before any IPv6 static routing will work, IPv6 unicast routing must be enabled globally on the router — without it, the router won’t forward IPv6 packets at all, regardless of how many static routes you configure. The correct command is ipv6 unicast-routing, entered as a single hyphenated keyword:
Router0> enable
Router0# configure terminal
Router0(config)# ipv6 unicast-routing
Router0(config)# exit
Router0# write memory
Building configuration...
[OK]
Router0#
Note: it’s easy to accidentally type this as two separate words (ipv6 unicast routing) rather than the correct hyphenated form (ipv6 unicast-routing) — the hyphen matters, since Cisco IOS treats this as a single keyword, and the unhyphenated version won’t work as intended.
Parameter Reference
- ipv6-prefix — the destination network address you’re adding to the routing table.
- prefix-length — the prefix length of that destination network, added to the routing table alongside the prefix itself.
- ipv6-address — the IPv6 address of the next-hop router. Using this option creates a recursive route, meaning the router has to perform an additional lookup to figure out which local interface actually reaches that next-hop address.
- exit-interface — the local interface used to forward packets toward the destination, sometimes called a directly connected static route. This is typically used on point-to-point links, where there’s no ambiguity about which single interface the traffic should exit through.
Recursive vs. Directly Connected Static Routes
This distinction matters more in practice than it might first appear. When you specify a next-hop ipv6-address, the router has to perform a second, “recursive” lookup in its own routing table to determine which local interface can actually reach that next-hop address — an extra step that adds a small amount of processing overhead, and one that can fail silently if the route to the next-hop address itself ever disappears from the table.
When you instead specify an exit-interface, there’s no recursive lookup needed — the router already knows exactly which physical interface to use. This makes exit-interface routes simpler and slightly more efficient, but they only work cleanly on genuinely point-to-point links (like a serial connection or a point-to-point GRE tunnel), since on a shared, multi-access network (like Ethernet), specifying just an exit interface doesn’t tell the router which specific neighbor on that segment to actually send the packet to — for a multi-access network, you generally need to specify the actual next-hop address instead.
Example Topology
[See Topology Diagram]
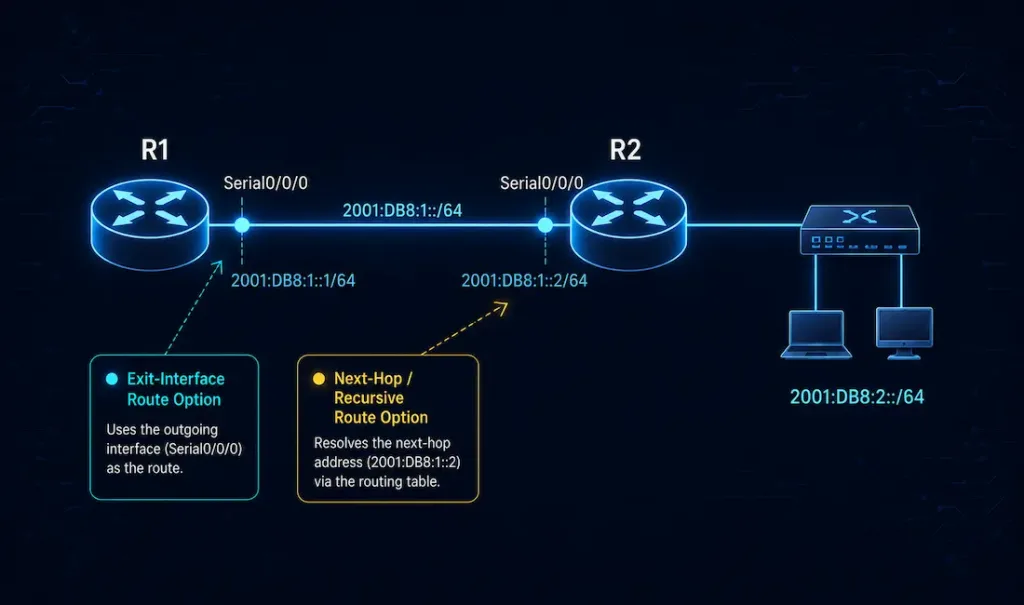
Consider two routers, R1 and R2, connected via a point-to-point serial link, with R2 also connected to a LAN segment using the prefix 2001:DB8:2::/64. R1 needs a static route to reach that LAN segment behind R2.
Configuring this as a recursive route via R2’s next-hop address:
R1(config)# ipv6 route 2001:DB8:2::/64 2001:DB8:12::2Configuring the same route using the exit interface instead, since this is a point-to-point serial link ([See Topology Diagram]):
R1(config)# ipv6 route 2001:DB8:2::/64 Serial0/0/0Both accomplish the same goal here, since the link is point-to-point — but only the next-hop version would work correctly if R1’s connection to R2 were instead a shared Ethernet segment with multiple routers on it.
Administrative Distance for IPv6 Static Routes
Like their IPv4 counterparts, IPv6 static routes have a default administrative distance of 1 — trusted over nearly every dynamic routing protocol except a directly connected interface (AD 0). This is exactly why a floating static route needs its administrative distance manually raised above 1: without doing so, the static route would always be preferred over the dynamic route it’s meant to serve only as a backup for.
Configuring a floating static IPv6 route — continuing the R1/R2 example above, suppose R1 also learns a route to 2001:DB8:2::/64 dynamically via OSPFv3 (default AD 110), and you want a static route to serve only as a backup if OSPF fails:
R1(config)# ipv6 route 2001:DB8:2::/64 2001:DB8:12::2 130The trailing 130 sets this static route’s administrative distance to 130 — higher than OSPFv3’s default of 110, so the dynamic route wins under normal conditions, and the static route only takes over if the OSPF-learned route disappears from the table entirely.
Verifying IPv6 Static Routes
After configuring a static route, verify it actually installed correctly:
R1# show ipv6 route static

IPv6 Routing Table - default - 5 entries
S   2001:DB8:2::/64 [1/0]
     via 2001:DB8:12::2
show ipv6 route (without the static keyword) shows the full routing table, including routes learned from any dynamic protocols, which is useful for confirming exactly which route — static or dynamic — actually won the administrative distance comparison for a given destination.
Common Mistakes to Avoid
- Forgetting to enable
ipv6 unicast-routingfirst. Static IPv6 routes simply won’t take effect — and IPv6 forwarding won’t happen at all — until this is configured. - Mistyping
ipv6 unicast-routingas two separate words. The hyphen is required; without it, the command won’t do what you intend. - Using only an exit interface on a shared, multi-access network. This can cause next-hop resolution issues (like unnecessary or failed Neighbor Discovery lookups) since the router has no way to know which specific neighbor on that segment should receive the traffic — reserve exit-interface-only static routes for genuinely point-to-point links.
- Forgetting to raise the administrative distance on a floating static route. Without doing so, the static route will always win over the dynamic route it was meant to serve as a mere backup for, silently overriding your intended routing design.
Summary Static Routes
A summary route consolidates several smaller subnets into a single routing table entry, using a shorter prefix length that covers them all. This reduces the size of the routing table and simplifies the overall design, at the cost of some precision — traffic destined for any address within the summarized range gets forwarded the same way, even if the actual destination subnet doesn’t exist.
For example, if R2’s LAN side actually contains four separate /64 subnets — 2001:DB8:2:0::/64, 2001:DB8:2:1::/64, 2001:DB8:2:2::/64, and 2001:DB8:2:3::/64 — these can often be summarized into a single /62 route rather than requiring four separate static route entries on R1:
R1(config)# ipv6 route 2001:DB8:2::/62 2001:DB8:12::2This single entry covers all four /64 subnets in one routing table line, assuming they were allocated as contiguous, summarizable blocks in the first place — summarization only works cleanly when the underlying subnets share enough of their prefix bits in common. Planning your IPv6 addressing scheme with future summarization in mind — allocating contiguous blocks to related sites or departments rather than scattering them arbitrarily — pays off considerably once a network grows large enough that individual /64 static routes for every subnet would otherwise clutter the routing table.
Static Route Types at a Glance
| Route Type | Purpose | Key Detail |
|---|---|---|
| Standard | Route to a specific destination network | Same concept as a standard IPv4 static route |
| Default | Catch-all route for unmatched traffic | Uses prefix ::/0 |
| Floating | Backup route, active only if primary fails | Requires a manually raised administrative distance |
| Summary | Single entry covering multiple subnets | Requires contiguous, summarizable address blocks |
Conclusion
The ipv6 route command closely mirrors its IPv4 equivalent, but getting a few details right — the hyphenated ipv6 unicast-routing command, the recursive-vs-exit-interface distinction, and administrative distance for floating routes — is what separates a working configuration from a subtly broken one. Once IPv6 unicast routing is enabled, configuring standard, default, floating, and summary static routes on Cisco IOS follows the same fundamental logic CCNA students already know from IPv4 static routing.
FAQs
What’s the difference between a recursive and a directly connected IPv6 static route?
A recursive static route specifies a next-hop IPv6 address, which requires the router to perform an additional lookup to determine which local interface actually reaches that address — useful and necessary on shared, multi-access networks where more than one neighbor might be reachable through the same interface. A directly connected (exit-interface) static route instead specifies the outgoing interface directly, skipping the recursive lookup entirely, but this only works cleanly on genuinely point-to-point links where there’s no ambiguity about which single neighbor the traffic is meant for.
Why do I need to enable ipv6 unicast-routing before configuring static routes?
IPv6 unicast routing is disabled by default on Cisco routers, and without it enabled, the router simply won’t forward IPv6 packets between interfaces at all, regardless of how many static or dynamic routes you’ve configured. Running ipv6 unicast-routing in global configuration mode turns on this fundamental IPv6 forwarding capability, and it needs to be entered as a single hyphenated command rather than as two separate words, since Cisco IOS treats it as one keyword.
What administrative distance do IPv6 static routes use by default?
IPv6 static routes default to an administrative distance of 1, the same as IPv4 static routes, making them more trusted than nearly every dynamic routing protocol except a directly connected interface (administrative distance 0). This is exactly why floating static routes need their administrative distance manually raised — appending a value after the next-hop or exit-interface in the ipv6 route command — so the static route only activates as a backup once the preferred dynamic route becomes unavailable.
How do I configure a floating static IPv6 route?
Configure the route exactly as you would a normal static route, but add a trailing administrative distance value higher than whatever dynamic routing protocol is providing the primary path — for example, a value above 110 if OSPFv3 is the primary protocol, since OSPFv3’s default administrative distance is 110. This ensures the dynamic route wins under normal conditions, and the static route only gets installed in the routing table if the dynamic route disappears, providing a clean, automatic backup path without any manual intervention needed during a failure.
How do I verify that an IPv6 static route was configured correctly?
Use show ipv6 route static to see only the statically configured routes currently in the routing table, or show ipv6 route without the keyword to see the full table including dynamically learned routes, which is useful for confirming which route actually won out when multiple sources exist for the same destination. If an expected static route doesn’t appear, double-check that ipv6 unicast-routing has been enabled and that the syntax of the ipv6 route command itself — particularly the prefix length and next-hop or exit-interface parameter — is correct.