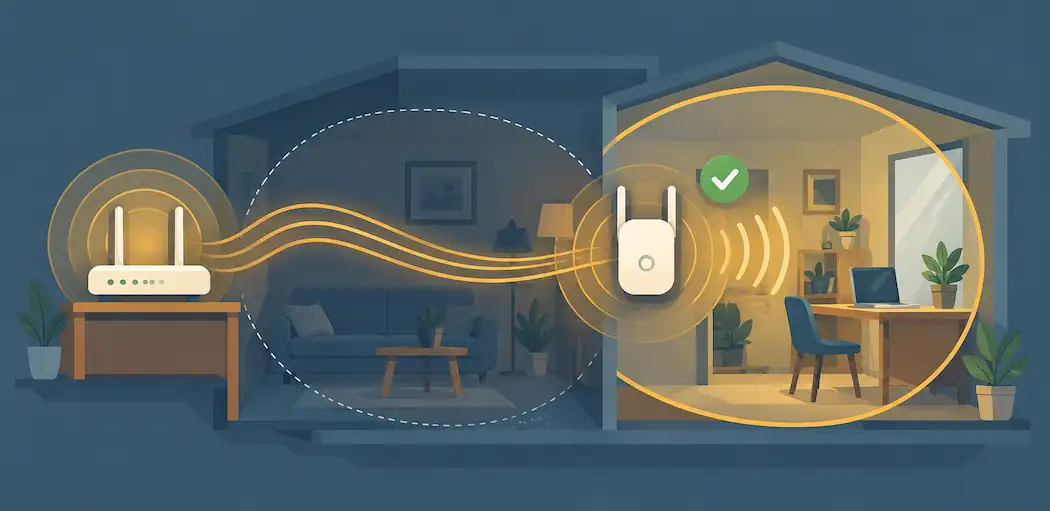
Dead zones are annoying. You know the spot — the back bedroom, the garage, the far end of the kitchen where your WiFi signal just gives up. A WiFi extender fixes that without you having to rewire the house or upgrade your entire router.
The Setek WiFi Extender is a budget option built for exactly this job. It picks up your router’s existing signal and rebroadcasts it, pushing coverage into rooms your router alone can’t reach. Setup takes about ten minutes if you follow the right order, and this guide walks through it step by step — including what to do if something doesn’t connect on the first try.
What a WiFi Extender Actually Does
Think of it like a relay runner. Your router hands off its signal, the extender catches it, and then carries it further than the original signal could go on its own.
Technically, it’s picking up your router’s wireless broadcast and repeating it on the same or a nearby channel. That’s why placement matters so much, which we’ll get to shortly. Put it too far from the router, and there’s nothing strong left to repeat. Put it too close, and you’re not actually extending anything.
Setek markets its extender as covering up to 2,500 square feet and supporting around 15 devices at once. That’s a reasonable claim for this class of device, though real-world results depend heavily on your home’s layout, wall materials, and how far you’re asking the signal to travel.
Before You Start
A few things to check first will save you a headache later.
Make sure your router is working normally and broadcasting WiFi before you touch the extender at all. Note your router’s WiFi network name and password — you’ll need to enter them during setup. And find a power outlet within about 15-20 feet of your router for the initial setup, even though you’ll move the extender later.
Setting Up With WPS (the Easy Way)
WPS stands for WiFi Protected Setup, and it’s the fastest way to pair most extenders with a router. If your router has a WPS button, use this method first.
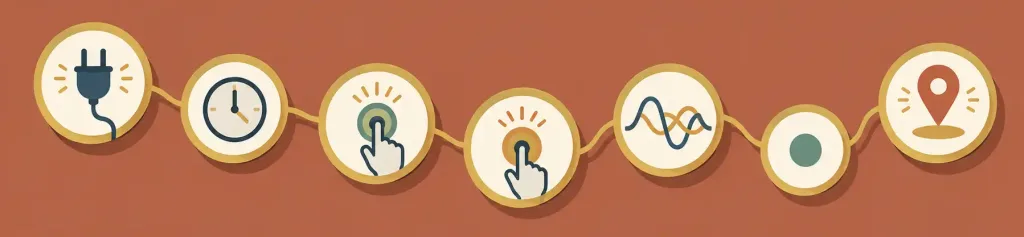
Step 1: Plug in the extender near your router.
Don’t place it in its final spot yet. For the initial pairing, it needs to sit close enough to your router to get a strong signal — a few feet away is ideal.
Step 2: Wait for the power light to stabilize.
Give it 30-60 seconds after plugging in. Most Setek extenders show a solid or slowly blinking light once they’re ready for setup, though the exact pattern can vary slightly by model.
Step 3: Press the WPS button on your router.
Routers usually have this labeled clearly, sometimes as a physical button, sometimes accessible through the router’s app. Press it once.
Step 4: Press and hold the WPS button on the extender within two minutes.
Hold it for about 2 seconds, then release. The timing window matters — if you wait too long after pressing the router’s button, the pairing window closes and you’ll need to start over.
Step 5: Watch for the connection light.
Both devices should show a blinking light while they negotiate the connection. This usually takes 10-30 seconds.
Step 6: Confirm a solid light on the extender.
Once paired successfully, the WPS or signal light on the extender typically turns solid (often green, though this varies by model). That’s your signal that setup worked.
Step 7: Unplug and relocate.
Now, and only now, move the extender to the actual dead zone you’re trying to fix. A spot roughly halfway between your router and the weak-signal area usually works best.
If any step fails — the light doesn’t turn solid, or the connection times out — don’t panic. Just start over from Step 1. WPS pairing is finicky, and a second attempt succeeds more often than not.
Setting Up Manually (If WPS Doesn’t Work)
Some routers don’t support WPS, or the button-pairing method just won’t cooperate. When that happens, manual setup through a browser is the reliable fallback.
Step 1: Connect to the extender’s own WiFi network.
When you first power it on, the Setek extender broadcasts its own temporary network — check the label on the device itself for this network name. Connect to it from your phone or laptop just like any other WiFi network.
Step 2: Open a web browser and go to the setup address.
Type 192.168.10.1 directly into your browser’s address bar. This is the default local address most Setek extenders use for their setup page.
Step 3: Log in with the default credentials.
Most Setek devices use “admin” as both the default username and password. Check the sticker on the extender itself if this doesn’t work — some units ship with different defaults.
Step 4: Select your home network from the list.
The setup page will scan and display nearby WiFi networks. Find your own router’s network name in the list and select it.
Step 5: Enter your WiFi password.
Type in your router’s WiFi password exactly as it appears — this field is case-sensitive.
Step 6: Save and let the extender reboot.
This usually takes 30-60 seconds. Don’t unplug it during this step.
Step 7: Reconnect and relocate.
Once it reboots, reconnect your phone or laptop to your normal home WiFi network (not the extender’s temporary one), confirm you’re online, and then move the extender to its permanent spot.
Getting the Placement Right
This is the step people skip, and it’s the one that determines whether the extender actually solves your problem.
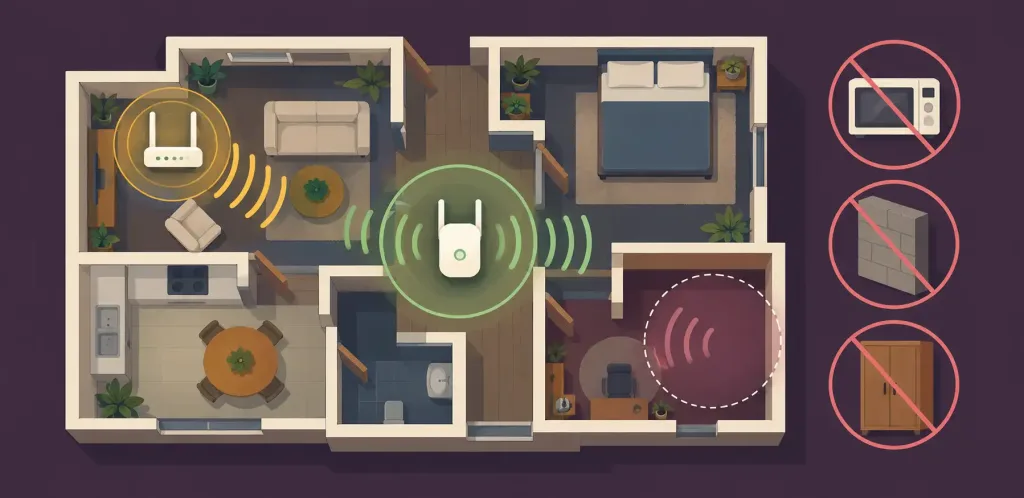
A good rule of thumb: place the extender roughly halfway between your router and the area with weak signal, somewhere it can still pick up a strong signal from the router itself. If the extender’s own connection to the router is weak, it has nothing good to repeat, and your dead zone stays dead.
Avoid placing it inside cabinets, behind large appliances, or right next to microwaves and cordless phones — all of these interfere with WiFi signals. An open shelf or a plug at roughly mid-height in an open room tends to work better than a low outlet tucked in a corner.
If one extender doesn’t fully solve a large home’s coverage, some routers and extenders support a mesh-style setup with multiple units. That’s a bigger project than this guide covers, but worth knowing as an option if a single extender leaves gaps.
Resetting Your Setek Extender
Sometimes the cleanest fix for a misbehaving extender is starting fresh. A factory reset wipes its configuration and returns it to out-of-box settings, so you’ll need to run through setup again afterward.
Step 1: Locate the reset button.
It’s usually a small, recessed button on the extender’s body — you’ll likely need a pin or paperclip to press it.
Step 2: Press and hold for about 10 seconds.
Keep steady pressure the whole time rather than pressing repeatedly.
Step 3: Watch for the light to change.
Many units show a red or rapidly blinking light during the reset process, signaling the reset is underway.
Step 4: Wait about 30 seconds.
Let the extender fully restart before doing anything else.
Step 5: Confirm the reset by checking the default address.
Connect to the extender’s WiFi network again and browse to 192.168.10.1. If you reach a fresh login page asking for setup, the reset worked.
Step 6: Run through setup again.
Follow either the WPS or manual steps above to reconnect it to your home network.
Troubleshooting Common Issues
The extender won’t connect via WPS.
Double-check you’re pressing both buttons within the two-minute window. Try moving the extender closer to the router for the initial pairing, then relocate it afterward once the connection is confirmed.
The extender connects but the dead zone is still weak.
This usually means placement, not setup, is the problem. Move the extender closer to the affected area, while keeping it within solid range of the router.
You can’t reach the login page at 192.168.10.1.
Make sure you’re actually connected to the extender’s own network, not your home WiFi, when trying to access the setup page for the first time. If it still won’t load, a factory reset (above) often clears up a stuck configuration.
The extender’s WiFi network name looks identical to your router’s.
Some extenders create a separate network name by default; others merge with your existing network name automatically. If you’re not sure which network you’re on, check your device’s WiFi settings and look for two similarly named networks — connect to whichever one shows the stronger signal in your dead zone.
Frequently Asked Questions
What is the default IP address for a Setek WiFi extender?
It’s typically 192.168.10.1, entered directly into a web browser’s address bar while connected to the extender’s own network.
What’s the default login for a Setek extender?
Most units use “admin” for both username and password. Check the label on the device if that doesn’t work.
How far apart should the router and extender be?
Close enough that the extender gets a strong signal from the router, but far enough to actually reach your dead zone — roughly the midpoint between the two is a reasonable starting point.
Does resetting the extender delete my home network settings?
No. A reset only erases the extender’s own configuration. Your router and home network are unaffected — you’ll just need to reconnect the extender to your network afterward.
Can I use a Setek extender with any router brand?
Yes. WiFi extenders are generally brand-agnostic and work with any standard router, provided both support the same WiFi standards.
Why does my extender keep dropping the connection?
This is often a placement issue — too far from the router, or too much interference from walls and appliances. It can also happen with outdated firmware, if your model supports updates; check the extender’s setup page for that option.
The Bottom Line
A budget extender like the Setek won’t work miracles, but for the price, it does a genuinely useful job of pushing WiFi into spots your router can’t quite reach on its own. WPS setup is the fastest path when it cooperates; manual setup through the browser is the reliable backup when it doesn’t. And when something goes wrong, a reset and a fresh setup attempt solves the problem more often than any deeper troubleshooting does.
Get the placement right, and most of the common frustrations with these devices disappear entirely.