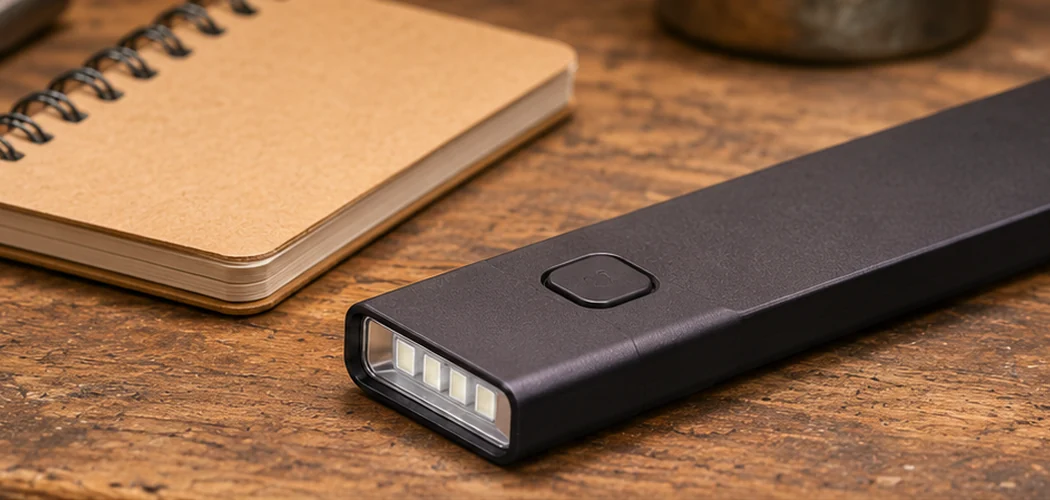
The Olight Arkfeld UV is a flat pocket flashlight with two separate LEDs. One gives you white light for ordinary tasks. The other emits ultraviolet light that can make certain materials fluoresce. A selector lets you switch between them. The combination makes sense when you often need both kinds of light and want to carry one device.
Two numbers describe different things. 1,000 lumens is the maker’s peak rating for the white LED. 365 nm is the typical wavelength of the UV LED. The manual reports UV optical power separately in milliwatts. If you are comparing listings, put those numbers in separate columns. A listing that calls it a “1,000-lumen UV flashlight” mixes the two specifications.
This guide uses the manufacturer’s published specifications and explains how to apply them to a purchase. Start with the light mode you expect to use most, then check the runtime and charging arrangement for the way you work.
Olight Arkfeld UV specifications at a glance
According to the Olight Arkfeld UV manual, the model weighs 87 g and has a body about 110 mm long, 25 mm wide, and 15 mm thick. The manufacturer publishes the ratings below from its own testing. The runtime and output you see can vary with the condition and charge of the battery.
| Specification | Published rating |
|---|---|
| White light, Turbo | 1,000 lumens initially, stepping down to about 300 lumens |
| White light, High | 300 lumens initially, stepping down to about 60 lumens |
| White light, Medium | 60 lumens |
| White light, Low | 15 lumens |
| White light, Moonlight | 1 lumen |
| Ultraviolet LED | 365 nm typical wavelength, 580 mW typical optical power |
| UV mode runtime | Up to 4 hours in the manufacturer’s test |
| Battery | Built-in 1,050 mAh lithium-polymer battery |
| Charging | USB-A magnetic cable |
| Water resistance | IPX7 |
The two LEDs serve different jobs. Pick white light when you need to see the shape or colour of an object. Use UV when you want to check whether a material fluoresces. If you are inspecting the same object under both modes, note what you see in each. The visible mark may look different depending on the surface and the lighting in the room.
White-light output and runtime
Olight’s Turbo rating follows a two-stage pattern. The manual lists about four minutes at the initial level, followed by about 110 minutes at 30% of that level. That works out to approximately 300 lumens in the second stage of the manufacturer’s test. The distinction matters when a listing gives a single runtime next to the peak figure. Expect the strongest setting for a brief look around, then plan longer jobs around a lower mode.
The manual lists High at 300 lumens initially for about 140 minutes, then at 20% for about another 20 minutes. Medium is rated at 60 lumens for about 12 hours and 50 minutes, while Low is rated at 15 lumens for about 41 hours. These figures describe separate tests. They give you a way to compare settings before you decide which one suits a particular task.
Think about where the light will land. A low setting may be enough to check a dark drawer, read a label, or find a dropped screw on a floor. A brighter setting may help when you need to see farther across a room or yard. Try the lowest level that lets you see the detail you need. If you spend most of your time using Medium, its runtime matters more to your purchase than the Turbo rating.
Check the white-light colour temperature when ordering. Olight’s manual lists a cool-white version rated at 5,700–6,700 K and a neutral-white version rated at 4,000–5,000 K. Neutral white has a warmer appearance than cool white. If you already use a light you like, compare its colour temperature with the listing. Ask the seller to confirm the variant if the description gives only a body colour.
What the 365 nm UV light can show
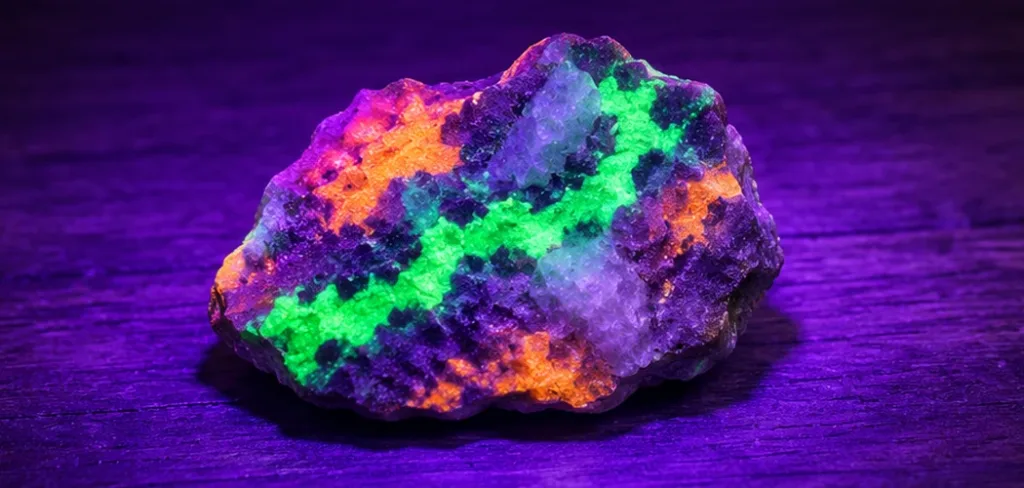
Some materials absorb ultraviolet radiation and emit visible light. This is fluorescence. The Arkfeld UV can help you see that response when the material fluoresces at the light’s wavelength and the surrounding visible light is low enough. For example, a mineral collector can use it to see whether a specimen has areas that glow under 365 nm illumination. Some specimens may show little or no visible response at that wavelength.
At home, a UV beam may reveal a bright mark on a surface that looked uniform under white light. That tells you where to look more closely. Cleaning residues, fibres, and other substances can fluoresce, so the colour of the glow alone gives you limited information about the source. If you are checking a carpet or fabric, look at the surrounding material under both modes before drawing conclusions. A UV flashlight shows a visual response and cannot detect an odour.
Ambient light changes what you can see. A mark that stands out in a dim room may be hard to spot next to a bright window. The surface itself can also glow and reduce the contrast. For a simple comparison, observe a known sample and the area you want to inspect under similar conditions. This gives you a better reference than judging from a photo shot by someone else.
Use UV only for the brief inspection you need. Keep the beam away from eyes and skin, avoid directing it toward people or animals, and take care around shiny surfaces that can reflect it. Follow the manufacturer’s instructions. The Canadian Centre for Occupational Health and Safety’s UV overview explains why eyes and skin need protection around UV sources.
Charging and pocket carry
The light charges through a magnetic contact on the body. The supplied cable connects to USB-A at the power source. If your travel charger has only USB-C ports, check how you will power the supplied cable before packing. A compatible cable is especially important for a used light. Ask the seller to include it or confirm that you can get a compatible replacement.
The manufacturer lists about two hours for a full charge under its stated conditions. That figure is useful for planning when to recharge. In practice, check the battery indicator before taking the light on a job or trip. The built-in battery means you will need to recharge it when it runs down. If your routine calls for swapping in a fresh cell and carrying on immediately, factor that into your buying decision.
The flat body is a practical reason to choose this shape. Compare its dimensions with the pocket, tool pouch, or organiser where you intend to keep it. Think about how you would reach for it while carrying other tools. Check that you can find the selector by feel and that you know which mode is selected before switching the light on. Read the lockout instructions before carrying it loose with keys or other items that might press the button.
Verify the model and condition before buying
Look for the exact Arkfeld UV name on the box or listing and confirm that the selector switches between white and UV. Olight also sells other Arkfeld variants, including versions with a laser. A similar shape or a shared product-family name can make a listing look right even when the emitter combination is different. Ask for a clear photograph of the model identification if the seller uses a shortened title or shows several versions.
For a second-hand unit, ask the seller to show both emitters switching on, the selector moving smoothly, the charging indicator working, and the cable attaching securely. Check for damage around the lens, clip, and charging contacts. A short demonstration confirms that the light turns on. It only tells you a little about how much charge the built-in battery can still hold. If runtime is important, ask how long the seller has used it and whether they have noticed a decline.
Consider what is included in the price. A cheaper used light can become less attractive if it arrives without the correct cable or with a weakened battery. Check the return terms, especially if the listing does not show which colour temperature you will receive. If buying in person, run through a few white-light settings and check the UV mode on a fluorescent sample while keeping the beam pointed away from anyone nearby.
Is the Arkfeld UV a good fit for your work?
Choose it when a compact white light and occasional 365 nm inspection are both part of your routine. A repair bench, a mineral collection, or a bag used for short inspections are good examples of where the two modes can share a job. If you mainly need a light for walking at night, compare beam shape, sustained brightness, and charging options first. If UV inspection is the main job, compare output at the required wavelength and how easily each light shows the fluorescence you are looking for.
If your main task calls for a concentrated white beam at a distance, compare the design with a dedicated light such as the Olight Javelot Mini. Start with where you need the light to land and how long you need it there.
Before ordering, name the two tasks you expect to do most. Then check that the listing identifies the right model, includes the cable you need, and gives runtime for the level you will actually use. For most buyers, those details will be more useful than the biggest number on the box.