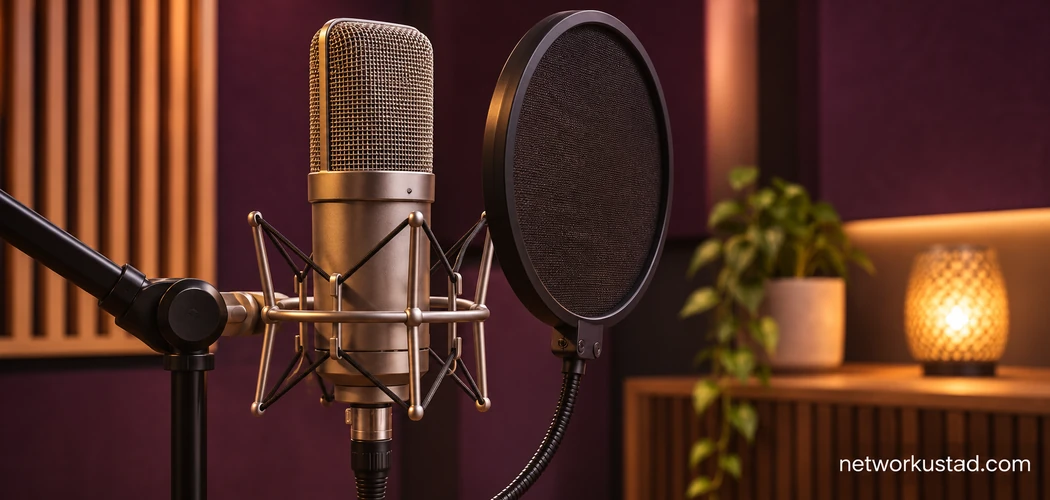
Condenser microphones are a good choice when you want to capture the details of a performance. Think of the pick brushing an acoustic guitar string, the soft edge of a sung note, or the decay of a cymbal. Those details are easier to use in a mix when the microphone hears them clearly and the room stays quiet enough to let them through.
The same setup can disappoint if the room has a loud fan or a hard wall behind the performer. A good result depends on what reaches the microphone. Before choosing one, decide what you want to hear and what you want to keep out of the recording. That will help you pick a sensible starting position, even if you only have one mic and a basic stand.
What Are Condenser Microphones Best For in Practice?
| Source | Useful starting setup | Listen for |
|---|---|---|
| Singing or spoken voice | One cardioid condenser with a pop filter | Plosives, mouth noise, room reflections |
| Acoustic guitar | One mic aimed toward the neck-body area | Boomy bass, exaggerated pick attack |
| Piano | One mic for mono or two for stereo | Uneven balance across the keyboard |
| Drum kit | One overhead to start, or a pair if you need stereo | Cymbal dominance, clipping, changes in mono |
| Small acoustic ensemble | A shared mic or stereo pair where the musicians sound balanced | A loud instrument masking quieter players |
These are starting points. On a loud source such as a drum kit, check the model’s maximum sound pressure level and leave room on the recording meter for the strongest hits. On a quiet source, listen to a pause in the recording. It can reveal more about the room and the setup than the performance itself.
What Makes a Condenser Microphone Different?
A condenser capsule uses a thin, electrically conductive diaphragm near a backplate. Sound moves the diaphragm, changing the distance between them. That movement changes the capsule’s capacitance. The microphone’s electronics turn those variations into a signal that can be recorded. This is the basic mechanism described in Shure’s guide to microphone transducers and pickup patterns.
Sensitivity tells you how much electrical output a microphone produces for a given sound pressure. Frequency response describes how it responds to different frequencies. A sensitive microphone can produce a stronger signal from a quiet voice at the same distance, but its sensitivity alone tells you little about whether that voice will sound bass-heavy or bright.
Several other specifications are worth reading together. Self-noise matters when the source is very quiet. Maximum sound pressure level, often abbreviated as max SPL, matters when you put the mic close to something loud. Polar pattern describes how the mic responds to sound from different directions. These characteristics vary by model. A microphone that works well across a room may still be a poor choice for a specific voice or a cramped desk.
Condenser Microphones for Vocals and Spoken Voice
For a singer, start with a cardioid condenser, a stable stand, and a pop filter. The filter helps soften the bursts of air produced by consonants such as p and b. Check which side of the microphone faces the performer. Many large-diaphragm models are side-address designs, so speaking into the top can give you a weaker or duller recording.
Set your input level while the singer performs the loudest phrase. Then record a quiet line followed by that loud one. If the soft line is hard to hear, check your distance and the room noise before turning up the gain. If the loud line clips, turn the input down and try again. A short rehearsal saves time when the performance starts.
For speech, put on headphones and listen to a few sentences at a normal speaking volume. Keyboard clicks, a desk fan, and reflections from a bare wall can all compete with the voice. Move closer if the recording sounds distant, and adjust the gain to suit the new position. If breaths are too prominent, try turning the mic slightly off-axis while keeping it pointed toward the mouth.
Condenser microphones can work well for narration in a quiet, soft-furnished room. In a busy room, a close-address dynamic microphone may be easier to work with if its placement puts the voice much closer than the distractions. Compare short recordings at similar playback levels. A louder test clip can seem clearer even when it contains just as much noise.
Condenser Microphones for Acoustic Guitar
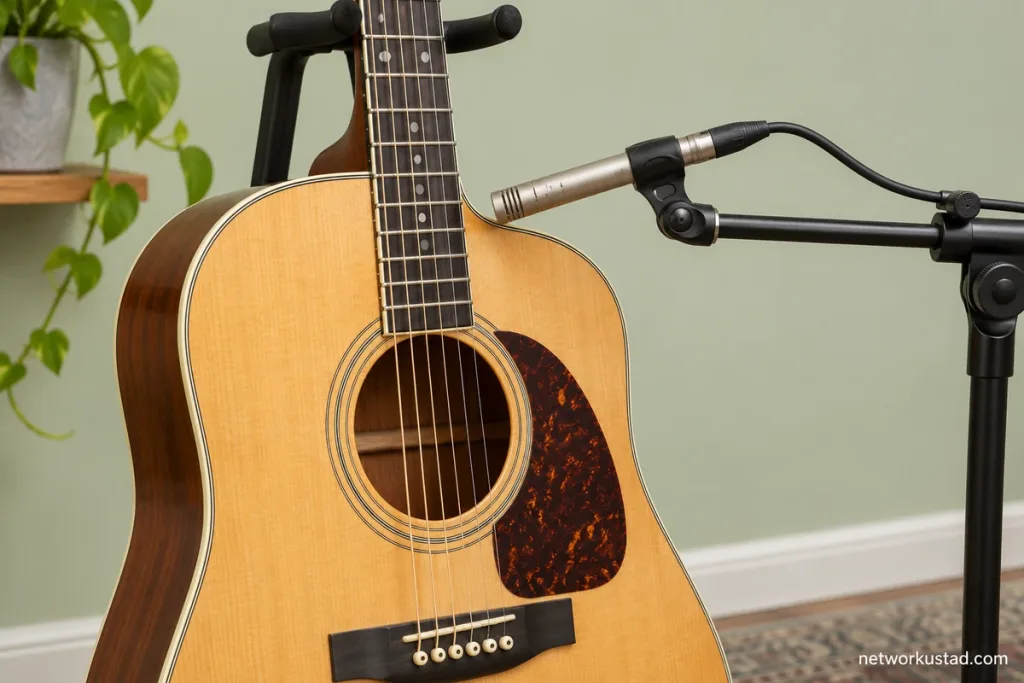
Start by aiming one microphone near the twelfth fret or the area where the neck meets the body. Record a few seconds of the actual part. If it sounds too boomy, try aiming farther from the sound hole. If the pick is dominating, make a small change in angle or move back slightly. Change one thing at a time so you can tell which move helped.
A solo guitar can carry more low end than a guitar sharing a mix with bass and drums. Decide what the instrument needs to do in the arrangement. When the guitar is there to add rhythm, a clear attack may be more valuable than a large, resonant sound. When it’s the only instrument, you may want to hear more of the body and the room. Shure’s home recording guide gives a useful starting point for placement.
Both large- and small-diaphragm condenser microphones can work here. A compact pencil mic is easy to position when the stand has to fit between a chair and a desk. A larger model can suit the guitar just as well if its tone works for the part. Before adding a second mic, see how far you can get by moving the first one.
How to Use Condenser Microphones for Piano, Drums, and Ensembles
Piano. Listen to the instrument from a few spots before placing a mic. With one mic, try a position that hears both hands clearly. If the high register dominates, move or turn the mic rather than immediately boosting the bass in software. Two mics give you more control over stereo width, but listen in mono as well. If notes lose body when both channels play together, reconsider the placement before reaching for an equaliser.
Drums. An overhead can capture how the whole kit sounds together. Start with the drummer playing a real groove. If the hi-hat drowns out the snare, try a position that favours the centre of the kit. Ask for the hardest hits the drummer expects to play and check for overload. Reducing interface gain can fix clipping at the interface. If the microphone itself is overloading, check whether it has a pad or try more distance.
Small ensembles. Walk around while the group rehearses and find a spot where the instruments sound balanced. Try the mic there first. You can also move a loud player back or bring a quiet player forward. That can produce a better balance than trying to fix a single mixed track later. If the goal is stereo, use a pair or a purpose-built stereo mic. A small diaphragm on its own doesn’t create a stereo recording.
Large vs. Small Diaphragm Condenser Microphones
Large-diaphragm models are common for vocals and narration. Small-diaphragm pencil models are common around acoustic instruments and drum overheads. Use those pairings as a starting point when borrowing or buying a mic. A model’s actual frequency response, pickup pattern, and position will tell you more about the result than diaphragm size alone.
If you record only one singer, look for a model that suits that voice and is easy to place behind a pop filter. If you move the mic between guitar, percussion, and different players, a slim body can make placement easier. When you need stereo, decide how far apart the microphones can go in your room and whether you have two suitable inputs. Those practical limits can settle the choice faster than reading a long list of specifications.
How to Connect and Power Condenser Microphones
A USB condenser typically contains its own audio interface and draws power through USB. It can be convenient for recording one voice to a computer. Check operating-system support, the connector on your device, and whether the microphone has a headphone output if you want to monitor yourself directly. For a phone or tablet, confirm support for that exact combination of device, cable, adapter, and app.
An XLR condenser usually needs a mic input on an interface, mixer, or recorder. Many models require phantom power. Check the microphone manual and the input specifications before switching it on. Some microphones use a battery or a dedicated power supply. A cable that fits at both ends still leaves the question of whether the input can supply what the microphone needs.
If you already own an interface, count the usable mic inputs before buying a pair of condenser microphones. Confirm that both inputs provide the power your models require. Budget for stands and cables too. A mic on a stable stand at the right height can solve a problem that a more expensive capsule would still leave you with.
Positioning Condenser Microphones in a Small Room
When you record at a desk, try moving the mic stand away from the wall before buying acoustic panels. Talk at your usual volume and listen to how long the sound hangs around between words. A thick curtain or a soft furnishing near a reflective surface may help with the sound bouncing back into the room. If the noise comes from outside, test again at a quieter time. If it comes from a fan you can safely switch off during a short take, try that first. A second recording gives you something concrete to compare.
Make a Short Test Before the Full Take
- Listen to the room. Record several seconds of silence at the gain you expect to use. Listen for hum, fans, traffic, or reflections.
- Play at real volume. Include the quietest and loudest parts. Set the input so the strongest peaks stay below clipping.
- Move the microphone. Try a small change in distance or direction, then repeat the same phrase. Label the two takes so you can tell them apart.
- Compare at similar loudness. Listen for clear words or notes, then check what the microphone picked up around them.
- Keep the original. Save the full take before removing false starts. If you only need a shorter clip, follow a basic audio trimming workflow and export a separate copy.
This test can tell you whether condenser microphones are a good fit for the room you actually use. If you already own a mic, run the same test with it before buying another one. You may find that a change of position gets you most of the way there.
Frequently Asked Questions
Are Condenser Microphones Good for Podcasts?
They can be a good fit for one speaker in a quiet room. Try a pop filter and listen to a test that includes your normal speaking voice, a pause, and a louder line. If your desk or room is noisy, compare that result with a close-address dynamic mic before buying.
Can You Use Condenser Microphones Live?
Yes. There are condenser models made for live vocals and instruments. Check that the microphone suits the sound level and stage layout. The position of stage monitors matters because sound from the monitors can travel back into the microphone and cause feedback.
Does a Condenser Microphone Pick Up More Background Noise?
It can seem that way when it’s positioned farther from the source or used in a reflective room. Distance, pickup pattern, and gain all affect what you hear. Compare at the same playback level and try moving the microphone closer to the source before blaming the capsule.
Do You Need Two Condenser Microphones to Record Acoustic Guitar?
One is enough for a usable mono recording. Start there and get the balance you want. Add a second mic if you have a reason to capture stereo width or blend two perspectives. Listen with both channels combined to check that the sound still holds together.
If you’re setting up your first recording, choose one source and make a short test in your own room. For a voice, start with a pop filter. For guitar, start near the neck-body joint. The best reason to choose a condenser is that it captures the details you want in that setup.