Smartphone photography has come a remarkably long way. Today’s phone cameras rival dedicated point-and-shoots in many scenarios, yet they still hit a wall when it comes to optical versatility. You can’t zoom without losing quality, capture sweeping landscapes without distortion, or photograph tiny details with the clarity they deserve — at least not with the built-in lens alone. That’s where clip-on lenses enter the picture, quite literally transforming what your phone camera can do in seconds. These small, portable accessories snap onto your device and unlock wide-angle panoramas, stunning macro close-ups, and impressive telephoto reach that software tricks simply can’t replicate. But for many users, even tech-savvy ones, the experience isn’t always seamless. Questions about compatibility with newer phone models, frustration with lenses that won’t align properly, and uncertainty about which type to buy can turn an exciting upgrade into a headache. This guide cuts through the confusion. We’ll walk you through how to select the right clip-on lens for your device, attach it correctly every time, and use it to capture photos that push your smartphone photography to its full potential.
Understanding Attachable Lenses: Benefits and Types
Attachable lenses are compact optical elements designed to sit directly over your smartphone’s built-in camera, expanding its capabilities without any permanent modification. Think of them as interchangeable lenses for a device that was never designed to have them. They work by refracting light before it enters your phone’s native lens, effectively changing the focal length or magnification in ways that digital zoom and software filters cannot match. The result is optically enhanced imagery with genuine detail rather than algorithmically interpolated pixels.
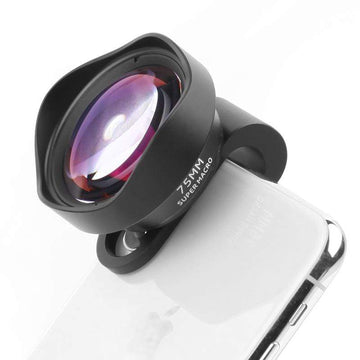
The practical benefits are hard to overstate. A wide-angle attachable lens lets you fit dramatically more into a single frame — ideal for architecture, group shots, or sweeping landscapes where stepping back isn’t an option. Macro lenses reveal a hidden world of texture and detail, turning everyday objects like flower petals or circuit boards into striking compositions. Telephoto options bring distant subjects closer with real optical magnification, preserving sharpness that pinch-to-zoom destroys. Fisheye lenses create that distinctive ultra-wide barrel effect popular in action sports and creative projects. Some manufacturers also offer anamorphic lenses that produce cinematic lens flares and a widescreen aspect ratio favored by mobile filmmakers. With this range of options available, the key is matching the right lens type to how you actually shoot — something we’ll explore throughout this guide.
Ensuring Universal Compatibility for Your Smartphone
The promise of universal compatibility is one of the biggest selling points of clip-on lenses, but the reality requires a bit more nuance. Not every lens works perfectly with every phone, and assuming otherwise is the fastest route to blurry edges, dark corners, and wasted money. The good news is that a few minutes of research before you buy can save you from all of those frustrations.
Start with your phone’s camera layout. Modern smartphones vary wildly in how their cameras are arranged — some feature a single centered lens, others have dual or triple cameras stacked vertically, spread horizontally, or clustered in a square module. A clip-on lens typically covers only one camera at a time, so you need to know which lens on your phone serves as the primary shooter and whether the clip mechanism can isolate it without obstructing neighboring sensors. Phones with cameras positioned very close to the edge of the device can also pose problems, since the clip may not have enough surface area to grip securely.
Lens diameter matters more than most buyers realize. If the clip-on lens element is too small relative to your phone’s sensor and native lens, you’ll see vignetting — those dark circular borders that creep into your frame. Conversely, a lens that’s physically too large may interfere with your phone case or bump against protruding camera housings. Before purchasing, measure or look up the diameter of your phone’s camera bump and compare it against the clip-on lens specifications. Many manufacturers now publish compatibility lists for popular phone models, which is worth checking even if the product claims universal compatibility. When in doubt, opt for lenses with adjustable or padded clips and wider optical elements, as these tend to accommodate the broadest range of devices without sacrificing image quality at the edges.
Step-by-Step Guide to Attaching Clip-On Lenses
Getting a clip-on lens onto your phone sounds straightforward — and it is, once you know the proper technique. But rushing the process or skipping small details leads to the frustrations that make people abandon these accessories altogether. A methodical approach takes less than a minute and ensures consistently sharp, well-framed results every time you shoot.
Pre-Attachment Preparation
Before anything touches your phone’s camera, use a microfiber cloth to wipe the native lens clean — even a faint fingerprint smudge will degrade image quality once magnified through the attachment. Set up on a flat, stable surface where you can work with both hands. Unpack your lens kit and remove any protective caps from the clip-on lens element, inspecting both sides of the glass for dust or debris.
Aligning and Clipping the Lens
Open the clip mechanism wide enough to slide it over your phone’s edge without scraping the screen or back panel. Position the lens element directly above your phone’s primary camera — for multi-camera setups, target the main wide sensor, which is usually the largest one. Look through your phone’s camera app in real time as you slide the lens into position; you’ll see the frame shift as the optics engage. Center the clip-on lens so the image appears evenly illuminated with no dark crescents along the edges. Apply gentle, even pressure to close the clip, letting the padded grips hold the phone rather than forcing a tight squeeze that could stress the device or shift alignment.
Securing and Testing the Attachment
Once clipped, give the lens a light nudge to confirm it doesn’t wobble or rotate freely. Open your camera app, point at a well-lit scene, and take a test photo. Zoom in on the corners of the image on screen — if you spot vignetting or softness on one side, the lens is slightly off-center. Loosen the clip, reposition by a fraction of a millimeter, and test again. A properly aligned lens produces a clean, edge-to-edge image with no shadowing. If you’re using a phone case, try removing it should alignment prove difficult, as even slim cases can shift the clip’s seating position.
Troubleshooting Common Attachment Issues
A loose fit usually means the clip’s spring tension isn’t matched to your phone’s thickness — adding a thin adhesive pad inside the grip can solve this. Persistent vignetting often indicates the lens element is too small for your phone’s sensor; switching to a wider-diameter option eliminates the problem. If the clip physically can’t reach your camera because of a protruding module, look for lens systems that use magnetic mounts or dedicated adapter rings as an alternative attachment method.
Tips for Using Your Phone Camera with Attachable Lenses
Attaching the lens is only half the equation — how you shoot with it determines whether your results look amateur or genuinely impressive. Lighting is the single biggest factor in attachable lens performance. These optics add extra glass between your subject and the sensor, which slightly reduces light transmission. Shoot in natural daylight whenever possible, and when working indoors, position your subject near a window rather than relying on overhead artificial light. For macro work specifically, be mindful that your hand or the lens housing itself can cast a shadow on the subject at close focusing distances; angling slightly or using a small LED panel eliminates this problem instantly.
Focus behavior changes with clip-on lenses, and your usual tap-to-focus habits may need adjustment. Macro lenses have an extremely narrow depth of field, so locking focus by long-pressing your screen prevents the autofocus from hunting between foreground and background. Wide-angle lenses perform best when you focus on a subject in the middle third of the frame, since edge sharpness naturally falls off with less expensive optics. In your camera app, drop the exposure slightly — attachable lenses can introduce subtle flare in bright conditions, and a minor exposure reduction preserves highlight detail. Experiment creatively too: try a fisheye lens pointed straight up through a tree canopy, use a macro lens on raindrops clinging to metal surfaces, or mount a telephoto to capture candid street portraits with compressed, flattering backgrounds. The more you explore unconventional angles and subjects, the more these small accessories justify their place in your pocket.
Choosing the Right Phone Camera Accessories
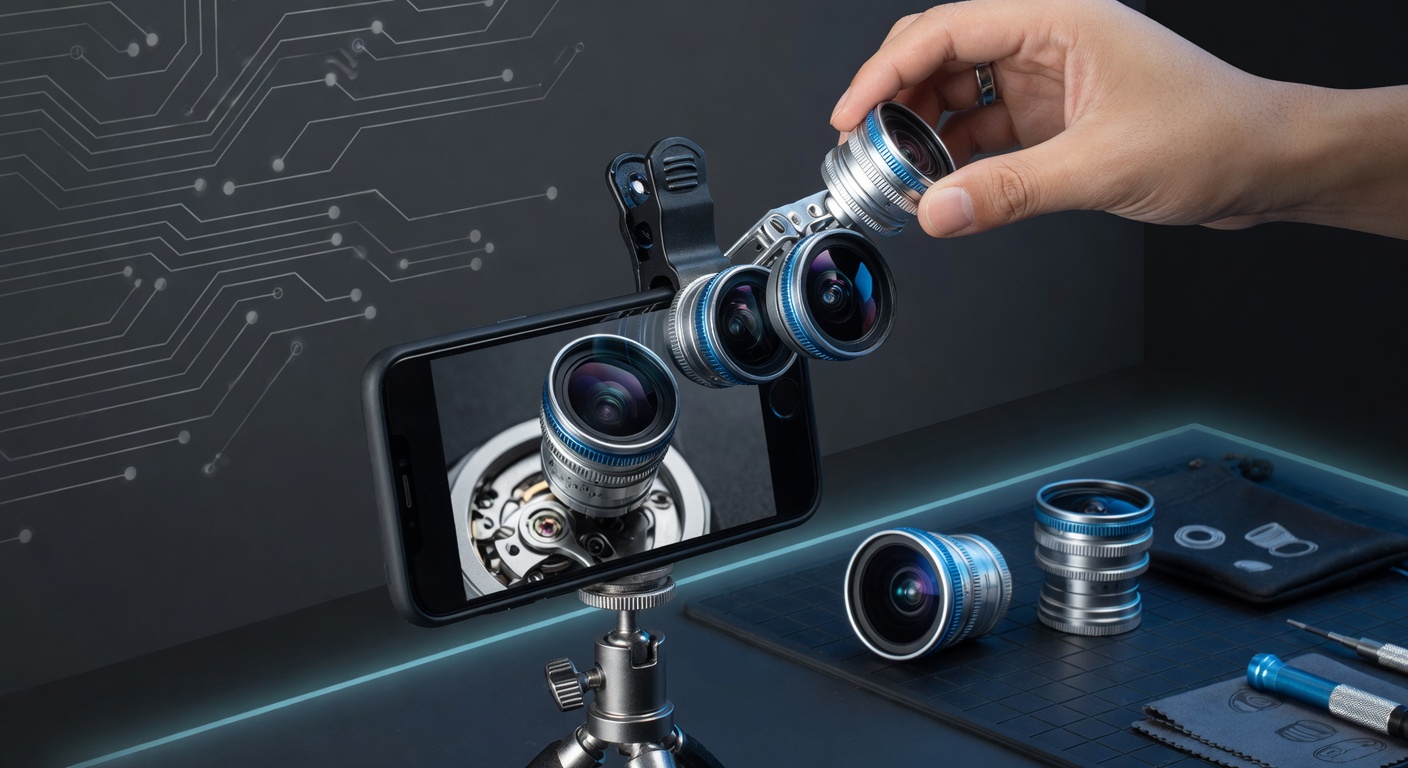
Clip-on lenses deliver their best results when they’re part of a thoughtfully assembled kit rather than a standalone impulse buy. A compact tripod or phone grip stabilizer makes a significant difference, especially with telephoto and macro lenses where even slight hand movement introduces blur. Look for a tripod with a ball head and a phone clamp wide enough to accommodate your device with or without a case — this flexibility matters when you’re swapping between bare-phone lens attachment and everyday protected use. A dedicated lens cleaning kit with a microfiber pouch, lens pen, and air blower keeps both your clip-on optics and native camera free of the dust and oils that quietly sabotage sharpness over time. If you frequently shoot with cases on, consider a phone camera lens ecosystem built around magnetic mounting — brands like Ulanzi offer slim metallic rings and magnetic lens systems that let you snap lenses on magnetically, bypassing clip alignment headaches entirely. A small LED light panel that clips to your phone or sits on your tripod rounds out the kit, giving you control over shadows during macro sessions and filling in harsh contrasts for portraits. Building this complementary setup doesn’t require a massive investment; it simply ensures that every time you reach for a clip-on lens, the supporting gear is already in place to help you capture the sharpest, most creative shot possible.
Mastering Clip-On Lenses for Better Smartphone Photography
Clip-on lenses remain one of the most accessible and rewarding upgrades available to smartphone photographers, but only when you approach them with the right knowledge. Compatibility comes first — understanding your phone’s camera layout, lens diameter, and case interference prevents the disappointment of vignetting, soft edges, and unstable attachments before they happen. The attachment process itself is simple once you treat it as a deliberate routine rather than a quick snap-and-shoot: clean your native lens, align carefully using your live camera feed, and test the corners of your frame before committing to a shooting session. From there, thoughtful technique elevates your results dramatically. Working with natural light, locking focus manually for macro subjects, and dialing back exposure to tame flare all separate polished images from forgettable snapshots. Pairing your lenses with complementary accessories like a compact tripod, magnetic mounting system, and portable LED light transforms a single lens purchase into a genuinely versatile mobile photography kit. The beauty of clip-on lenses is that they reward experimentation — every new angle, subject, and lens combination teaches you something about what your phone camera is truly capable of. Start with the lens type that matches how you most love to shoot, master the fundamentals covered here, and then push further. Your smartphone has more creative potential than you’ve tapped into yet.